Nov 30, 2012

we've moved: welcome to fork and flower!


i've been thinking about when to reveal this news... well, i never found the right moment. but it's sort of coming closer and closer, the big moment, and kind of inevitable in the process to share it here with you. though i suspect many of my 'readers' to just 'look' at the pictures (as i, admittedly, do with many blogs i love, dearly), i know of a few who are very attentive readers and are accompanying me on- and offline through this experience of being a blogger (it still sounds strange to my ears...). and i was wondering what you'd say to this piece of news? but let me tell you one thing after another...

within the past 2.5 (wow...) years of writing this blog, beautiful inside my head (short: BIMH) it's been a great adventure and also (honestly) a life-changing experience for me (read here why i love it so much). truth be told: i started this blog with no clue about blogs (in general) and no clue as to what exactly i wanted to do with it. and frankly speaking i didn't know anything about photography (not unessential for a food blogger, turns out. ahem...). but back then, well, my blog just really only seemed like a diary. i felt like sharing some of the beautiful things i encountered in my life. so, back then, it seemed like a good idea to call it 'beautiful inside my head'. i soon found out, however, that what i really wanted to do is cook, and talk about food, and serve people, and of course to document that and share it with likeminded people (read: you). so the focus of my blog has kind of shifted. and now i need a new 'vessel' for all my food-centered ideas... and in the process, a few things on here will change... soo... here's what's going to happen::

a new name: fork and flower 
so yes, it's obvious we need a new name for the new future that's ahead of us... after long and hard thinking (okay, i totally didn't have to think a lot, but you don't have to know that...) i came up with 'fork and flower'. basically because it combines two things i really like: food & styling. and the perfect dinner like totally needs a nice bunch of flowers on the table, too. but... there is time for more blah-di-blah another time. for now, that will just have to do. and in the process, i'm going to move my blog address to my own domain i already got my own domain (ta-daah!), with the new blog adress and everything! 

how to find forkandflower.com
i kinda hope you still find your way to this site, just like before (at least that's what google promised me will happen...). so you should be able to find me under 'beautiful inside my head' - and you'll be forwarded directly to forkandflower.com. brilliant, right? same holds true for bloglovin' and other subscriptions. well, it's still a bit scary, to be  honest... and probably not everything will work perfectly from the first moment on. but hey... we'll manage. it's always a process, and we're only at the start here... so, please bear with me! 

an adequate new look (coming soon)
of course, i've also got a few tricks up my sleeve... like a new, shiny logo! but let me keep that a bit of a secret, still... (oh, it's so much fun to tease you, haha).

my own, tiny little restaurant (read: a supper club) - in my home
i knooooow! so exciting, right? 'fork and flower - the secret supper' club chez moi will start in january 2013. dito, news will be announced another time (i don't want to strain you too much for now).

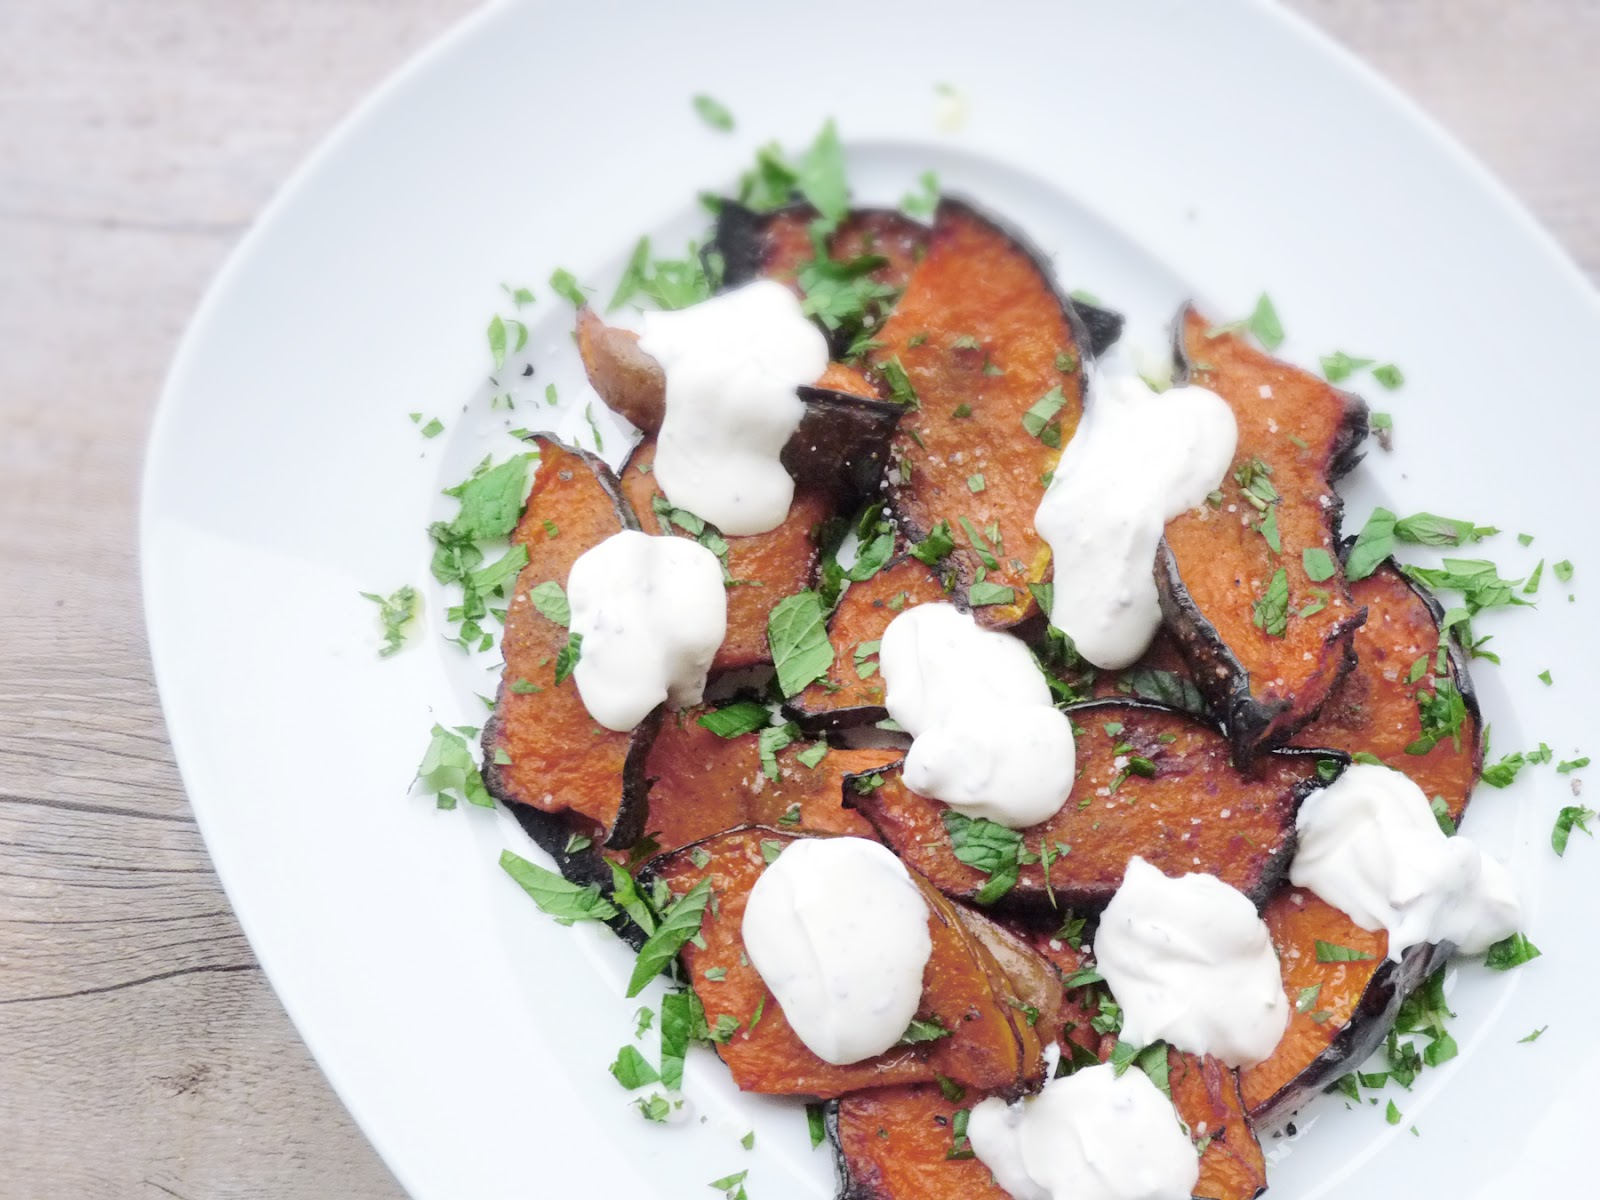
so, in short (for those short-cut readers...): just remember that there is a new name for this site, and it's forkandflower.com! for now, i just ask you to bear with me, and be a little patient if not everything is looking so good during the move. i'll promise to still provide you with some mouthwatering dishes in the process! that's something i can assure (some already lined up).

sending you all my love, thank you for reading
xo
scarlett

ps: yayyy! so excited! uhm, i said that, i know... okay, ta!

picture source: old pictures from a vintage post of mine (chuckle)

Nov 29, 2012

chai latte (from home-made chai tea blend)


since i'm not a big coffee drinker (i.e. hate it), but still embrace a good hot "cuppa something", alternatives are always welcocme (as my three year old nephew appears to be saying now). meaning it's either down to hot chocolate or tea. a good chai tea (or chai latte, in it's creamier version) is very welcome in the colder season. especially when it combines the following traits: hot (check!), spicy (check!), sweet (check!) and nice (definitely check!). this mix here was home-made, and i'm planning to give it to my family for christmas (duh, never much of a surprise around here...). added bonus: your home will smell divine when you combine all the spices! 

note: the blend recipe is not to be seen as an accurate science...! or so. so, the recipe below is (for once, really) to be seen as a rough guideline, not as accurate measurements. just throw in a bit of this and a bit of that, and if it looks and smells nice (i.e. equally balanced) then you'll be fine!

home-made chai tea blend
makes about 4 small jars (pictured above)

ingredients:
1 1/2 cup simple black tea (i used an loose English Breakfast one)
3 cinnamon sticks, broken apart and crushed with a mortar
1/4 cup candied ginger, finely chopped (watch out, it's a sticky business!)
4 tbsp. red pepper
3 tbsp. black pepper corns
2 tbsp. cloves
9 (or more, if you like...) star anise, roughly crushed into pieces with a mortar
3 tbsp. aniseed
3 tbsp. fennel seeds
4 tbsp. dried rose buds, roughly crushed in a mortar
4 tbsp. whole cardamom pods, roughly crushed in a mortar
3 tbsp. coriander seeds

directions:
combine the tea with all the other ingredients. make sure there are no too big chunks (especially from the cinnamon sticks), otherwise crush the tea & spice blend some more in a mortar. fill into small glass jars. decorate according to your liking. can be stored for a year or more, but still the spices will lose their intense flavor. so make sure you get freshly bought spices and i'd recommend to use the blend up within a few months (shouldn't be a problem).


chai latte
makes two cups

ingredients:
2 tbsp. chai tea blend (see above)
2 cups hot water
2 tbsp. brown sugar (i used demarara sugar) (note: it can almost never be too much sugar for a chai tea...)
1/2 cup milk, heated and foamed
1 tea bag (the ones you use for loose tea blends) or a tea egg / sieve
pinch of cinnamon for topping, if you like
cinnamon stick & straw for decorating

directions:
heat the water in a kettle. put the tea blend in a bag or egg and let steep, in a tea pot, for 5-10 minutes (a chai tea needs to be rather strong, i find, and the flavors of the spices have to develop long enough or else it will just taste like a conventional black tea... and we don't want that). sweeten with the sugar. in the meantime, heat the milk and constantly whisk it with a wire whisk, to foam it nicely. pour the chai tea in mugs, add the milk and add some of the foam on top. decorate with a pinch of cinnamon, a cinnamon stick and, if you like it playful, with a straw. serve hot.

Nov 28, 2012

acorn squash with ginger rose yogurt


somre more squash before the squash season comes to it's big finale... this dish was particularly delicious! the yogurt with hints of zesty ginger and rose buds made it really exotic.

acorn squash with ginger rose yogurt
 
ingredients:
1 slice acorn squash, skin on
1/2 cup yogurt
1 cm piece ginger, grated
1 tsp. crushed dried rose buds
1 pinch chili flakes
1 lime, juice and zest
1 tsp. fleur de sel
handful fresh mint leaves, coarsely chopped
olive oil

directions:
cut the acorn squash in thin slices. brush it with the olive oil, season with fleur de sel and roast it in the oven (preheated to 220 degrees c / 400 degrees f) for 25 to 30 minutes. combine the yogurt with the ginger, lime zest and juice, rose buds, chili flakes and fleur de sel. season with fleur de sel. when the squash is done, let cool slightly, then add dollops of the yogurt and sprinkle with the mint leaves. serve warm or at room temperature.

Nov 27, 2012

roasted artichokes with basil pistacchio pesto


i'll never get enough of the beauty of artichokes... they're so majestic! ooh, and the taste... i've sung many an ode to artichokes on this blog here (e.g. here, here, here and here) - and today i'm resisting to post yet another. however, one thing must be said: those stems..! have you seen those stems? that's quite unique in an artichoke, i believe. i had to try and roast them (as i never did with artichokes) - leaving a significant part of the beautiful stems on. feed them to people ou love, very much.

roasted artichokes with basil pistacchio pesto

ingredients:
5 purple artichokes (with long stems, though i think that's hard to specifically find)
2 lemons
2 bunches basil leaves
1 garlic clove
1/2 cup olive oil
1/4 cup pistacchios (unsalted)
fleur de sel
1 tsp. acacia honey

directions:
fill the basin with ice cold water. half one lemon and squeeze the juice into the basin. now prep the artichokes (i always wear gloves for it): remove the tough outer leaves, but leave the stems partly on. half the artichokes and remove the inner hay. place in the lemon ice water. preheat the oven to 220 degrees c / 400 degrees f, with the grill function turned on. brush each artichoke with some olive oil and sprinkle with a little salt. roast in the oven for about 20 minutes (the artichokes are allowed to turn dark brown but shouldn't turn black, or they're going to be very tough...). in the meantime, make the basil pistacchio pesto: combine the basil leaves, garlic, pistacchios, honey and about 1 tsp. fleur de sel with the olive oil in a food processor. blend until partly smooth (you won't want a cream, but more like a chunky salsa). remove the artichokes from the oven, and fill each heart with a spoonful of the pesto. serve warm.

Nov 26, 2012

tortelli alla zucca


many people like crafting because it's got a soothing effect on them to do something with their hands, to be totally absorbed by a manual task. it gives them peace of mind. it's not entirely different what i like to do: shape food things. like pasta. 

so far, i've only ever tried ravioli (which is, admittedly, no rocket science...). to shape some pretty tortelli isn't really as tricky as it looks, though, either. it just needs some patience and love. for the filling, i reminded myself of a trip to parma, italy, a few years back, where i had tortelli alla zucca (pumpkin). pumpkin filling in pasta is always, by nature, slightly sweet and not very fragrant. i like it - once a season. but i didn't want to overdo the sweetness... so i added ricotta to the pumpkin mash and some finely grated parmiggiano. a real italian experience it was.

tortelli alla zucca

ingredients:
1 cups pumpkin mash (i made mine a day in advance)
1 cup ricotta
1/2 cup parmesan cheese, finely grated
1 egg
1 tsp. salt
1/2 tsp. freshly ground black pepper
generous pinch ground musk
2 pasta pastry packages, pre rolled out (if you want to make the pastry from scratch, here's how)
some flour for dusting
1 egg white, with a bit of water

for serving: 
salt for cooking
1 shot extra virgin olive oil
handful sage leaves, thinly sliced
3 tbsp. butter 
generous pinch ground musk
pinch fleur de sel
freshly grated parmesan cheese

directions:
combine the pumpkin mash with the ricotta, parmesan and egg and season with salt, pepper and some musk. lay the pasta pastry out on a floured surface. cut into equal sized squares of about 5x5 cm. place a teaspoon (nut-sized) of the pumpkin mash filling in the center of each pastry square. shape the tortelli (i recommend watchin this video, though it's in italian... just go to 2'46'', that's where they start with the shaping). proceed until all the pastry or all the filling is used up. 

for serving, cook the tortelli briefly (2-3 minutes, or until they appear at the surface of the water) in well salted water. drain and immediately add a shot of extra virgin olive oil, so that the tortelli won't stick together. in the meantime, prepare the beurre noisette: simply heat the butter, very slowly (!) in a small saucepan. i usually let it sit on the lowest heat for 10 to 15 minutes, until tiny brown dots form and the butter takes on a nutty smell. add a bit of fleur de sel, some musk and the sage leaves. fry the sage leaves for a minute, until they're crispy. arrange the tortelli on a plate and pour the browned butter of them. decorate with some parmesan cheese if you like and a fresh sage leaf. serve immediately.

Nov 25, 2012

sauternes pears


happy sunday! can you believe how fast this pre christmas season is going by? it's unnerving... my house looks rather christmasy as it is, already, so that part is pretty much covered. so far, i've decorated with many candles and silver votives everywhere, a tiny christmas tree (it's outside... so it doesn't really count... for all those, who were going to remark on the fact that it's way too early for a christmas tree), pinecones in a champagne cooler, some silver bells in a large glass jar and a few other tidbits around the house. 

yesterday, we even made our own wreath in a group of girls. we started with brunch (we had cheese with those sweet sauternes sauteed pears, and a few selected sweets) and continued with each one making their own wreath. it was a fine bunch of girls and a despite the warm (!) weather, i think it was a pretty christmassy experience.

some more christmas preps are coming. apart from the obvious gift hunt at hand, there is some serious diy action going on... like, tomorrow i'm going to make 3 large jars full of preserved lemons (as gifts), pickle some cherry peppers, make a couple of different cookies (vanilla crescents, it's a must), jar some more tai tea, buy (or make?) a table linen (omg, that task... it's freaking me out) and make a table decor (consisting of small clay pots filled with moss and a candle) for our christmas dinner. there is lots to do, still! 

sauternes pears

ingredients:
6 pears, peeled
1 liter sauternes or other sweet white wine
1 cup acacia honey
3 star anise
6 cloves
3 cinnamon sticks
6 fresh bay leaves

ingredients:
put the sauternes, peeled pears, honey and spices in a large saucepan. sautee for 10 minutes, turning the pears over occasionally, until tender. drain. preheat the oven with the grill function on. place the pears on a baking sheet line with parchment paper and bake them for only a few minutes, until the pear tops are colored golden-brown. let cool. pierce the bay leaves into the pears. serve with cheese.

Nov 21, 2012

porcini tarte tatin


my evening rituals (on nights i'm alone at home) are simple: come home, put on the kettle for some tea (i've gotten myself a really nice chocolate and orange one from kusmi, it's divine!), find something to eat, turn on the tv ('perfect dinner' is my favorite show of all times), light a candle, and, rather unelegantly, enjoy my rustic meal in front of the tv. it's not very sophisticated - but it's very, very nice. though i prefer to cook for someone and sit down to a properly laid out dining table - i enjoy the change. and on occasions like that, i'm blissfully happy with my 'fast food' (that's usually followed by various sweets...).

something i won't cook for myself (though it's pretty fast to make, actually): a porcini tarte tatin. something luxurious like that... well, it's best enjoyed in company... we made these on a cooking day with the women in our family. you wouldn't imagine the massive load of things we produced... and it was all really good. conclusion: porcini tarte tatin, needs to be consumed in company. cheers, friends!

porcini tarte tatin

ingredients:
500 g porcini
1 puff pastry
2 garlic cloves, minced
1/2 onion, finely chopped
2 tbsp. butter
2 tbsp. olive oil
1/4 cup vegetable broth
handful fresh oregano, leaves picked
handful fresh parsley, leaves picked, finely chopped
1 lemon, zest and juice
a few drops truffle oil
fleur de sel
black pepper, freshly ground

directions:
preheat the oven to 220 degrees c (400 degrees f). clean the porcini mushrooms with a mushroom brush or with a dampened paper towel. slice them, lengthwise, into fine slices. heat a large frying pan with half of the butter and half of the oil. now fry the porcini in two batches; on each side for a few minutes, until golden-brown. put onto a plate, season with salt, pepper, and drizzle with vegetable broth (so that the porcini won't dry). proceed in the same way with the second batch. after that, briefly fry the onion and garlic, and put them to the fried porcini on the plate. 

grease two small, rectangular pie pans. remember: a tarte tatin is a pie that's turned up side down, so you start with the mushrooms first. start by neatly placing the fried porcini in the pan (you don't need to follow a specific pattern). lay the puff pastry on top, to cover the mushrooms and pan, and trim off the excess pastry. press firm the corners. with a fork, poke some holes into the cover. bake for 40 to 45 minutes (the puff pastry gets better when really well baked, dark golden-brown and crispy - meaning it always takes longer than you'd think to bake). 

remove from the oven and turn it upside down (with a plate on top) immediately. season with a few drops of the truffle oil (it enhances the mushroom flavor nicely), a pinch of fleur de sel and some lemon juice and zest. add a bit oregano and parsley. serve warm.

thank you


there are so many things i am thankful for... and with thanksgiving approaching so quickly, it's a good time to make a note of it. so here are the three things i am currently thankful for:

- the good food (like this lavish dinner for myself at london's nopi) in my life
- amazing highlights ahead (some of them still in 2012, some of them early in 2013)
- foggy winter mornings, early darkness and cosy candlelit evenings - to spend in my beautiful home

even though technically we don't celebrate thanksgiving in switzerland, it's one of my favorite holidays (not least because of the good, good food!). sadly, this year i won't be hosting or attending a thanksgiving related dinner. sad, i know. though i've (in past years) made the odd turkey (some even didn't fit in the oven, ahem...), i would by no means consider myself an expert (at turkey). but i sure as hell know how to put together side dishes, oh yes. 

here is a tiny selection of ten dishes i made in the past, that would be great for a thanksgiving feast. in case you need some last minute inspiration.

- oven glazed carrots with feta
- maple roasted cabbage with caramelized hazelnuts
- baked sweet potato with spiced yogurt & grapes
- garlicky sauteed rainbow chard
- orange thyme beetroot salad
- potato crisps with tahini yogurt dressing
- confit artichokes
- white bean & roasted garlic hummus
- moroccan carrot salad
- lemony roasted potatoes

ps: gee, wow, i managed to incorporate not only one but two lists into one post... call me a sucker for lists, i guess you've got enough evidence. also, i hope you don't mind my neurosis to keep things tidy...

Nov 20, 2012

acorn squash with coriander lime salsa


sadly, i've realised that the squash season seems to be almost already over? how come? i mean, it's still cold outside. it feels like it's still squash season. but the retailers and markets around here don't sell them anymore in all their colorful quirkiness. i'm always sad to see a seasonal veg leave (until next year)...

but luckily, i have a few left on my balcony! always a trick up my sleeve, me. i had this pretty dark green one and thought: why not leave the skin on for once? since it's so nicely dressed up. the roasted renders the skin tender and eatable, too.

acorn squash with coriander lime salsa

ingredients:
1 piece acorn squash, skin on
1 bunch coriander
1 lime, juice and a bit of the zest, too
1 tsp. acacia honey
1 garlic, minced
1 cm ginger, minced
1 drop harissa
1 cm green chili or jalapeno
olive oil
fleur de sel

directions:
preheat the oven to 220 degrees C / 400 degrees F and line a baking sheet with parchment paper. cut the acorn squash in thin slices. brush it with olive oil and season with fleur de sel. place in the oven and roast for about 30 to 40 minutes, until browned. in the meantime, combine the coriander leaves, lime juice and zest, honey, garlic, ginger, harissa and jalapeno, with some more olive oil (about 3 tablespoons) and process in a food blender. season with fleur de sel. arrange the squash on a plate and drizzle over the salsa. serve warm or cold.

Nov 16, 2012

fig hazelnut chutney


honestly, what's the need to cook (all the time) - when you can buy really good things, too? i don't mean convenience, ready to heat sort of things.... but, like, really good cheese and a really good bread. that's a perfect dinner, right?

i know... it's sometimes a bit of a no-no among foodies, to just 'buy well', right? i take it it's some pride thing... like; you have to cook in order to eat well, otherwise, without the personal effort, everyone could do it and it's not special at all.

duh! honestly, i don't agree. isn't it like that: when you are a foodie, you know what the good cheese, the good sausage, snacks, ice cream or cookies look like - around the world. so why not put this knowledge to use?

a (bough) aromatic mountain cheese (from the italian speaking part of switzerland), some (gifted) walnuts (from someone's backyard), a few (sourced) slices of good charcoal oven bread (from germany) and a (specially ordered) truffled salame from italy can account for a simple, rustic, and yet, very sophisticated meal. add a bit of home-made fig hazelnut chutney - and you're done. no cooking, maximum impact. i like to be efficient like that (that's my business administrations background for you, ha!).

fig hazelnuts chutney

ingredients:
500 g figs, cleaned and chopped
1 cup hazelnuts, peeled and chopped
1 cup sugar
1/2 cup apple vinegar
1/2 cup water
1/2 tsp. chili flakes
1 tsp. truffle oil

directions:
melt the sugar in a saucepan until caramelized and dark brown colored. add the figs, vinegar, water and chili flakes. let cook for 10 minutes. in the meantime place the nuts in a frying pan (without any oil) and toast for 2-3 minutes (being careful not to burn them). add them to the figs. heat through. pour into cleaned jars (makes about 2 to 3 normal jam sized jars). can be stored (properly canned) for a few months, or once opened in the fridge for 2-3 weeks.

notes: i made the chutney already to give for a christmas gift. my family is a group of fine cheese-lovers, and it's really good to go with cheese. try it with a piece of grilled meat, too. it's supposed to do a good job of adding flavor (sweet, sour and nutty).

Nov 15, 2012

purple cauliflower with rose petals


outerwear is seriously understimated, i think. only recently, i went to the shops to look (with no intention to shop) for winter coats. do you know how hard it is to find the perfect winter coat? the one that will make you happy for many, many winter seasons to come (or at least, the many, many winter days - this season)? 

side note: as a kid, i would get a fine coat - only to find the disappointment, after a week or so - that i didn't like it that much, after all. and then, of course, i was stuck with it, forever (read: all of winter time) - which in switzerland seems to last forever. this problem (i believe women around the globe have experienced it with some fashion item or the other), well it sort of mostly exists with coats, for me. that's why i'm referring to it as 'the coats quest'. i want to look good, in winter, not just under the coat but also in a coat. and i'm afraid i feel i never have, felt comfortable in any of my coats. they always sort of felt like a compromise. you know; not invest too much money this year - means not getting exactly what you'd like. and so the vicious cycle of not being happy (with the coat) starts. the result? i am constantly really, really worried about finding the good coat. my coat! that i will love forever. i'm properly whining about it to my friends, in real life, all the time, so you might as well get your share, here, as well. call me nuts (i've got it certified), but i just cannot relax when it comes to coats, ever*.

*or maybe, someday, when the universe is kind, i fill find it, be able to afford it, and it will be there to buy in my actual size...! eep! then, the quest will be over. will my life be empty? we will find out... i'll stay on to it!

the cauliflower has nothing to do with coats quest (except maybe that i was wearing my not-perfect coat to go buy it...). but it's indecently simple to make. and it looks like it's not. it's a deceiving little dish, that one...

purple cauliflower with rose petals

ingredients:
1 purple cauliflower, cut into florets
3 tbsp. olive oil
1 tsp. fleur de sel
1 tbsp. dried rose petals, crushed (in a mortar)
1 tbsp. black cumin seeds

directions:
preheat the oven to 220 degrees celsius / 400 fahrenheit. line a baking sheet with parchment paper. coat the florets with the olive oil, salt and cumin seeds. place in the oven for 30 minutes, until tender and slightly browned. remove, sprinkle with the crushed rose petals and serve.

Nov 13, 2012

labneh with artichokes


greg malouf is one of my current heroes... his modern, middle eastern cuisine is so inspiring! it's not difficult to recreate, it's vegetable-oriented, it's full of flavor... in simple words: i love his cookbook 'arabesque' (that i reviewed here). and i've already tried several dishes off it. one is the labneh with artichokes. another one (coming soon) is a marvelous white bean soup with merguez (oh my day, is it good). and yet another one is a yeasted flat bread (though technically i also borroughed the recipe from another chef's book, to be featured here soon). so, this post somewhat turned out to be an inspiration (or teaser, in my advertising influenced language...) post (unintentionally). i hope you keep on reading, because i've got lots in store, and it's only fun if i can share it with you.

ps: i've been making labneh forever (surprisingly, so far only documented here, though it's really a staple in my kitchen), and i just can't get enough. it's my favorite starter for entertaining. my guests love it, too (or so they say).

labneh with artichokes
inspired by greg malouf (though i probably didn't really follow his recipe)

ingredients:
500 g creamy (i take greek) goat's yogurt
1 can artichokes, sott'olio (in oil)
1 handful mint leaves, finely chopped
1 handful parsley leaves, finely chopped
2 garlic clove, minced
1 lemon, zest and juice
1 tsp. fleur de sel 
1 drop harissa
1 tsp. black cumin seeds
1/2 cup olive oil

directions: 
pour the yogurt into a (fine mesh) colander lined cheese cloth. add a generous pinch of salt to the yogurt. shape into a ball with the cheese cloth. put something heavy on it (like a can of something) and place the colander with the yogurt on top of a bowl, to catch the liquid. place in the fridge and let drain for at least 24 hours (48 are better for a really firm, creamy result).

before serving, cut the artichokes in halves or quarters (depending on size). don't worry if they 'break', it can absolutely be like a loose, chopped up salad. add a little olive oil, the parsley and mint, one garlic clove, some of the lemon zest and juice (not all), a generous pinch of fleur de sel and the cumin seeds. toss to combine, season with more salt and pepper if necessary. 

remove the yogurt from the cheese cloth. season it with one garlic clove, a bit of the lemon zest and juice, a drop or two of harissa and some more salt (if necessary). note: i like my labneh basic, i.e. not very fragrant, but still, it needs a bit of salt and a garlic (though malouf wouldn't do it, i guess) won't hurt. too plain, after all, is sometimes boring. the harissa and lemon add a nice tanginess. 

for serving, spread the labneh onto a flat plate with a spatula. arrange the artichoke salad (in a tiny pile) in the middle. pour over the remaining olive oil, so that most of the labneh is covered in oil. sprinkle with some more fleur de sel (for the look). serve immediately, with pita or another yeasted flatbread. 

notes on preservation: if not to be served immediately, cover with cling film and store in the fridge for up to two days. if you want to preserve it for longer, shape balls out of the labneh and store them in a can filled with olive oil.

Nov 12, 2012

holidays approaching

things i added to my holidays' decor wish list:

1. lots of (striped, red, white and green) candy - by the way you can get this here
2. some tiny deer as cupcake toppers
3. silver spray-painted plastic deer (for some random fun)
4. several clay pots with covered with moss to make a rustic centerpiece
5. a wee christmas tree in a shabby pot, to give the balcony some christmas feel
6. a vintage bundt pan with pine cones and candles (check!)
7. a chevron fabric ribbon


if you want to have some more inspiration, go to my pinterest boards (thousands of pictures, pinned during sleepless nights, on endless journeys in buses and trains, and during queing for random stuff... await you, my friend).
xo
scarlett

picture source: 1, 2, 3, 4, 5, 6, 7

Nov 11, 2012

(glutenfree) chestnut cake


one of my all time favorite things in fall is chestnuts. chestnuts make the cold season bright. the lovely little balls, in their brown paper bags and their roasted goodness, warm not only the hands but also the souls. turned into a cake, it's not actually warming - but still more than soothing (i can never pass down something sweet on a rainy sunday afternoon...).

(glutenfree) hestnut cake (with vanilla whipped cream frosting)

150 g confectioners' sugar
3 egg yolks
150 g ground hazelnuts
200 g chestnut purée
100 g melted butter
3 egg whites
1 pinch salt

butter, for greasing pan

1 cup heavy cream
1 packet vanilla sugar
1 fig, in quarters, for decorating

directions:
preheat the oven to 180 degrees. with a mixer, whip the egg yolks with the confectioners' sugar until foamy. add the chestnut purée and then the hazelnuts. in another bowl, whisk the egg whites with the pinch of salt until stiff. fold into the dough mix. pour into a cake pan (i took a round 20 cm / 8 inch one), and smooth down with a spatula. bake for about 45 minutes on a low rack. after baking, let cool, then remove from the spring form and put onto a grid to cool completely. whip the cream with the vanilla sugar and frost the cake with it. serve immediately. 

Nov 7, 2012

basic roasted garlic & lemon chicken


i've always loved to welcome a new piece of clothing in my wardrobe. i was never one to turn down a bargain, or trends (that weren't here to stay... ahem). like leggings with studs (okay, i kind of still like these... sorry?). but recently, that has shifted. i catch myself wearing the same things, jeans, cardigans and skirts, and shoes, most of all, that i've been wearing a year or two years or even more (jesus christ) ago - and not caring (well, not really, at least...). it's just like 'oh well, those jeans were good last year, so they might just as well be good this year, too". it's kind of a new behavior and attitude. to not want for the latest awesomeness that the fashion industry champs came up with - but to want stuff that's good, that will last, that will make a difference. i'd rather have nothing (new) than shit, i.e. something of bad quality, that won't make me happy next year (or next month, even). i'd rather have one cashmere pullover than two cotton ones. i'd rather have one pair of comfortable and fitting jeans than two with the latest wash, that are too short / too tight / too low / too high / too (fill in missing word here)... yes, i now, strangely so, i started to prefer classics to fashionable, trendy, hipster fads. though i never believed this will happen to me, it has. so maybe, this shift does, like everyone (including moms around the world) says, indeed come with 'age'? and, let me tell you, it's a nice change of routine, and actually very calming and relaxing, not to have to chase the latest fads. liberating!

another thing that's doomed to come with age: the variety of foods we like. n'est pas? as a kid (and the majority of my teen and beginning of my tween years) i hardly ate any meat. actually, zero, if possible. my mother used to make the odd roasted whole chicken on friday nights for family dinners for my brother and dad. but i never felt a pull towards it. 

that was, maybe, because i never really tried it, or gave it a second chance (mind you, my mother's chickens certainly were fantastic as chickens went...). i recently have given it another chance, though. i boldly bought one (a whole! chicken!) at the shop, without thinking about it. i just bought one. i thought: 'hell i'm going to be thirty this year! might as well pull off a whole roasted chicken - and eat it, too!". and so the story of my first roasted chicken goes... it was a good chicken (for a second chance). it was crispy and salty and slightly garlicky (hmmm...) outside, and soft, juicy and buttery-smelling inside. it was fragrant and, strangely, comforting to eat a chicken, with nothing but a few slices of baguette. hello, new fashion and food and other routines...! i like you!

basic roasted garlic & lemon chicken

ingredients:
1 whole chicken (about 1.5 kg)
1 cup butter (or more, if you dare to... you can't really overdo it with butter, here)
1 garlic (the whole bulb), halved (horizontally)
1 lemons, halved
2 tbsp. maldon sea salt
1 tsp. freshly ground black pepper
1 bunch thyme
1 bunch rosemary

directions:
preheat the oven to highest heat possible. place the chicken in a pan, rub with the butter and place the garlic and herbs in the pan. season with the salt and pepper, rubbing it into the chicken nicely. sprinkle with some lemon juice (about half the lemon), and place both halves in the pan as well. your chicken is ready to go in the oven! very simple.

note on the roasting: i first let the chicken roast in the very high heat for about 10 to 15 minutes, until the outside was already dark and crispy looking. i then lowered the heat to about 180 degrees / 350 fahrenheit, and let it roast for a further 45 minutes to 60 minutes. you can pour the juices over it occasionally, to turn it more crispy. i was told the chicken is done when the wings seem to loosen rather easily (when pulling) from the body.

remove the chicken from the oven and let it sit for 20 to 30 minutes, so that the juices develop nicely. cut it (with poultry scissors, which i didn't find, since i haven't made a chicken in years, really; or simply take normal scissors, but don't tell anyone) into it's part: the breast, the wings (...and... here my meat-knowledge stops, sorry... so just part it any way you like, you can't go wrong). serve it with baguette. and don't forget a bowl of warm water and a lemon slice for each guest to clean the sticky hands in it (yes, it's a legitimation to eat with the hands, here, too).

ps: please, please eat the garlic, too...! the roasting turns it very soft, and, yes, almost caramelized-like... not poisonous at all. kissing still allowed, i promise! so be bold and smear it onto the baguette. yep, that's right.

Nov 5, 2012

a fine pair

two words: je veux. these two basic pieces would be happily welcomed in my closet. a large, chunky knit cardigan (it's a missoni... they're simply great when it comes to knit) and an emerald green, small shoulder bag (gucci, drool...). this color has got to be my favorite, forever (documented here, e.g.). but does it justify a major (fashion) splurge? probably not... but it will soon be christmas, haha, and you can always make a gift to yourself, entirely... (laughing-like-a-crazy-woman at this brilliant idea of mine).

picture source: 1, 2